Riding an electric mountain bike, or e-MTB, is a bit different to getting on board a standard, non-powered off-road bike. If you've not done much mountain biking before then you'll need to get the hang of some basic skills, and if you're a regular rider you'll find that you'll need to adjust the way you ride.
Before we into the nitty-gritty of the actual mountain bike skills, and how they relate to an e-MTB over a regular mountain bike, the most important skill for new riders to understand and begin to learn, is how the human power and electrical power at your disposal work together.
Power modes
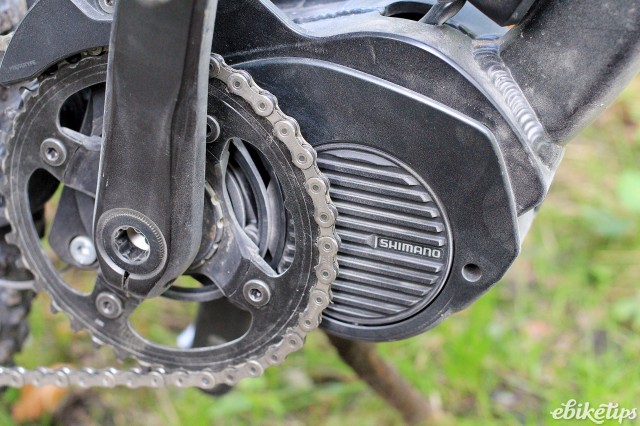
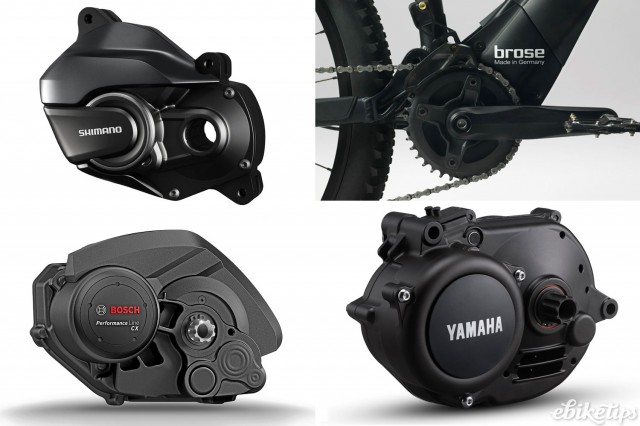
The motor has a number of settings to regulate power delivery levels. For example, the most popular motor, Bosch, has four; Eco, Tour, Sport and Turbo. Eco delivers the least amount of electrical assistance power. So for maximum mileage from a battery, you’d use that. Selecting ‘Turbo’ mode on the other hand, delivers maximum electrical assistance. This works the battery much harder and lowers the bike's overall available range. It also makes you smile like an idiot. Shimano, Yamaha and Brose motors have three assistance levels.
Don’t be shy. We all think we’ll be happy in Eco or Tour, but in reality we all try Turbo and instantly love the acceleration. Many people stick it in Turbo mode, then use the other less power hungry modes when the terrain is smooth or when gravity is helping you roll. Because modern battery life is pretty decent, most e-MTBs with a full charge will do a rolling two-hour trail ride in the highest assistance mode, occasionally flicking down to something lower. So, unless you’re looking for an all-day effort, or very hilly ride, where more time spent in the power sipping lower modes would be sensible, enjoy the full gas experience.
Switching between modes
Remember you can usually toggle between the different power modes on the fly with a single button push, via the dashboard. So you can go Turbo to blast the hard bits and say, Tour or Sport to cruise the easy stuff. In this way it can be used as a battery management system, to eke out the best balance between maximum range and maximum fun. That’s another (albeit easy to master) skill in itself. Most bikes have a handy range indicator and also show you the state of the battery. Specialized take this to another level with their Mission Control app: tell the app how long you want to ride for, or how far, and it'll do the assistance tweaking for you.
The traction equation
On paper it’s simple. Select a level of electrical assistance, start pedalling and the e-MTB's motor sensors figure out how much e-power to give the cranks to supplement your physical effort. On the road, it’s not too hard, but when mountain biking, where every meter of the trail can demand different levels of power, it’s trickier get right. Mastering it will take time and experience.
The motor sensors calculate your pedalling power and cadence many times a second – but always in the in the ‘now’. They are unable to predict the power you will need in a second or know why you’ve stopped pedalling for a second. This is because as advanced as they are, e-bike motor sensors can’t do the job of your eyes and brain and read the trail ahead: pre-empting a need for a jab of torque to exit a switchback, or a moment of no-power while you get the cranks level before a drop-off…
Skilled riders on regular mountain bikes manage without conscious thought: riding ‘in the zone’, as they say. To get the same level of power delivery control and fluidity from an e-MTB is more complex and requiring of some actual consideration of the ‘e’ element of an e-MTB, and how and when it’s likely to arrive.
Putting the power down
The goal is for the feeling at the pedals to be seamless and a synergy between motor and muscle. In practice, the fast and staccato on-off power delivery required for many mountain biking situations can leave the motors sensors with their microchip knickers in a twist. For example: say as you go through a bomb-hole style compression. As you suspend pedalling – to level the cranks through the dip – you can feel the motor cutting off (it thinks you might want to stop), leaving you with a momentary lag as you start to pedal out a second or two later.
Ideally you’d have either a constant, linear or perhaps even increasing level to help you up and out of the bomb-hole. In other scenarios, you might want the reverse, less power delivery when you want, or need, leg power alone.
Timing is everything
You will need to get used to the feel of your e-MTB's specific motor sensors, learn how sudden or delayed yourbike's power delivery is. How much crank rotation and pedal pressure is required to initiate the sensors to let the electricity flow? Remember, the motor sensors are just switches; they don’t actually know what we want (or when we want it) as well as we do.
Before you will be able to really rally an e-MTB through the technical trails with the flair and freedom of a regular mountain bike, you will have to spend a few hours getting a feel for the way the power modes relate and react to the pedals. Learn how the power feels in an open, low risk off-road area, like an empty park or playing field, where a miscalculation, won’t end up in you in parking in a ditch or hedge. Where and how the motor applies power will have a big effect on the way you ride the bike in certain situations. If it sounds hard or complicated, it isn’t. Learning to ride an e-MTB is a lot of fun. Learning the nuances will pay you back in spades whether you’re going on the flat, uphill or down dale.
Once you’re up to speed with how the motor works and the intricacies of how it delivers the power to the bike, you’re ready to start learning the skills you’ll need to pilot your e-mtb on trails. We'll cover that in part two.


